How to tell and DRAW stories with simple visual techniques
Why tell and DRAW stories?
Just like live visual notes, visual storytelling is a great way to communicate. Visual narratives date all the way back to the start of recorded history: cave paintings! Sometimes words are not quite enough to capture a full story. This is where visual storytelling comes in. Visuals can communicate ideas much faster than reading text, and can connect to our emotions in a way that words sometimes can’t.
Visual storytelling can take many different forms. Illustrations, photographs, comics, zines, movies, TV shows, videos, and more. We live in a world full of visual storytelling. Even “stories” on social media platforms–they’re all visual storytelling. And they’re definitely engaging!
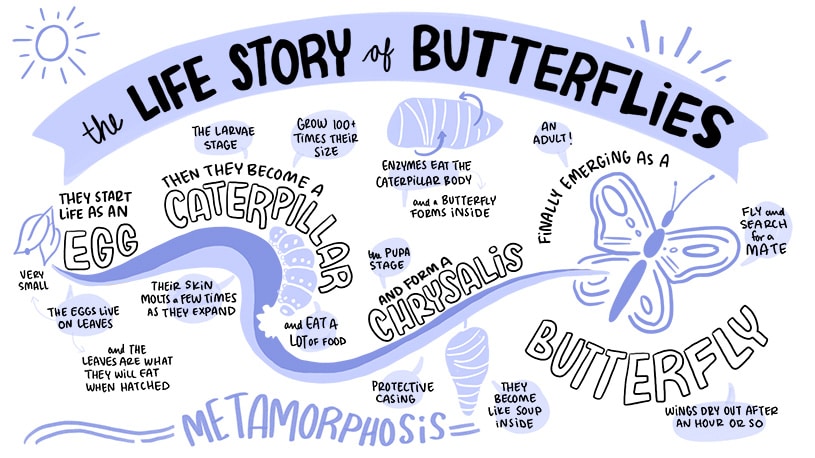
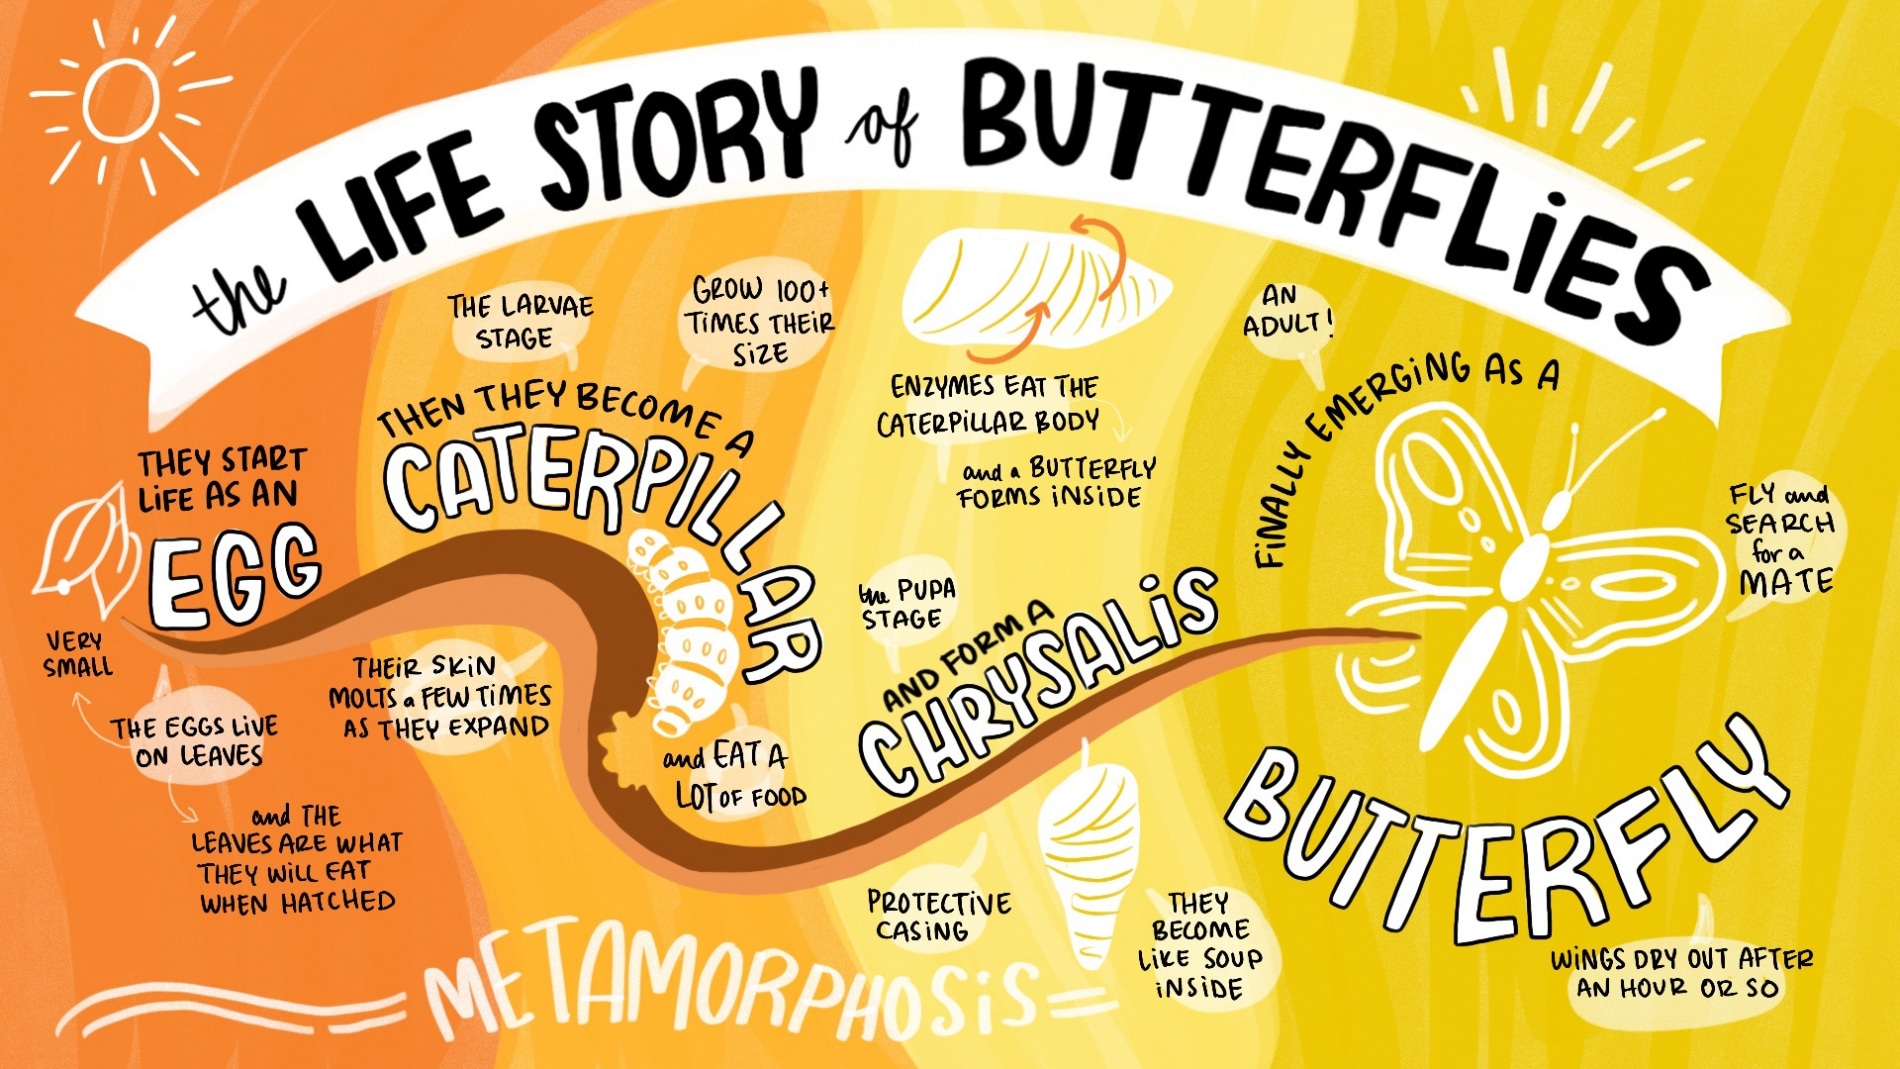
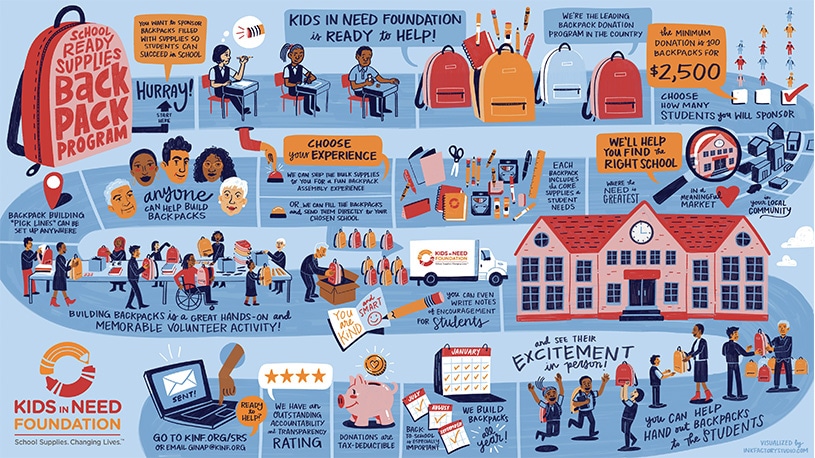
The skills that we utilize at Ink Factory to take live visual notes can also be applied to visual storytelling. Take this illustration for example:
Or this video we created for Wintrust bank:
In both of these instances, we used visual storytelling to help guide the eye and tell a story. Much more interesting than just sitting down to read about it with no imagery.
So, how do you get started on your own visual storytelling, especially if you think you can’t draw? Here are some helpful tips on using text and imagery to create a visual story. In this case, we will focus mainly on storytelling through an illustration.
1. Visual storytelling starts with an idea
That may seem obvious, but what kind of story are you hoping to tell? A story from your life, a historical event, the founding of a company, how your next great idea works–once you know what story you would like to tell, start brainstorming all of the most important points you want to cover. You can write these down on a page in bullet points since it is an early stage. Or, if you want to challenge yourself, write them out as a visual brainstorm. Here are some helpful guidelines for visual brainstorming.

2. Look for inspiration
Looking at other examples of illustrations and visual storytelling before designing your own is a great way to get started. When you find elements of other work that you really like, it helps to keep those as inspiration for creating your own. You can mix and match different things that speak to you about other drawings to help in creating a design.
3. Create a sketch
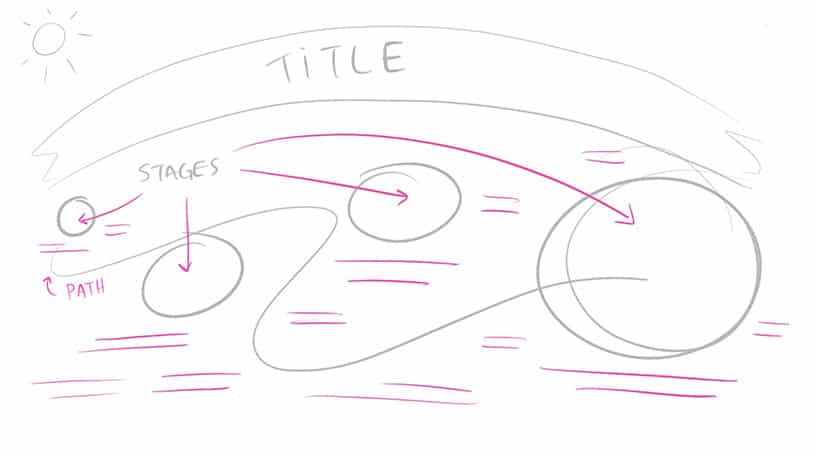
This is similar to writing an outline for a paper. You now have all of your ideas and some thoughts on what you want it to look like, but this step puts them all in one place in a cohesive manner. A sketch should be rough, quick, and is meant to act as a plan for where your visual elements will go and how they relate to one another. Don’t stress about creating beautiful drawings right now. Even stick figures are ok!
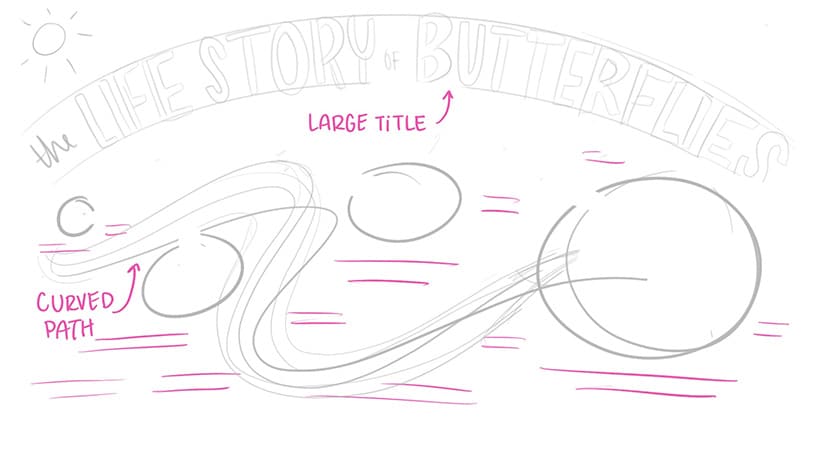
Just like with visual note-taking, make your title the largest and boldest thing on the page. Depending on what kind of story you are telling, the title can be placed on the top, middle or bottom of the page. For example, if you are just writing about your day, there may be many events or things that happened that are not necessarily related to each other, so starting with a title in the center allows you to showcase different parts of your day around the page. If you are telling a story in history, maybe having a title on the top of the page makes more sense so your eye can follow the page in a more linear manner, left to right. You can decide what works best for you.
Next, start writing down the points of your story. Since stories are linear, the points should move chronologically. But this does not have to visually be in one straight line. You can think of it like a game board, where the board itself guides your eye around the page. And that is where visuals come in!
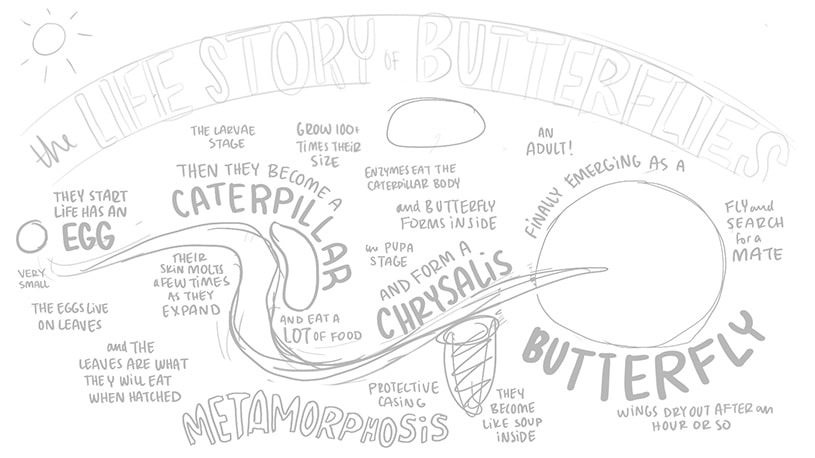
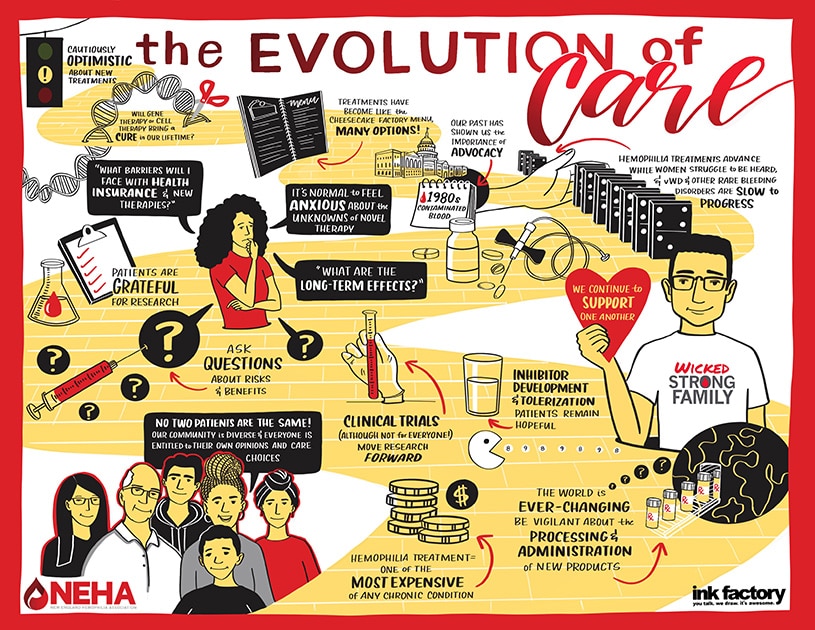
If you are not confident in your drawing skills, do not worry! There are ways you can take your text and arrange it on the page that still lend it to visual storytelling. In this example, even if there was no imagery and only text, it still would be a visual story compared to an article in the newspaper because of the way the text is arranged:
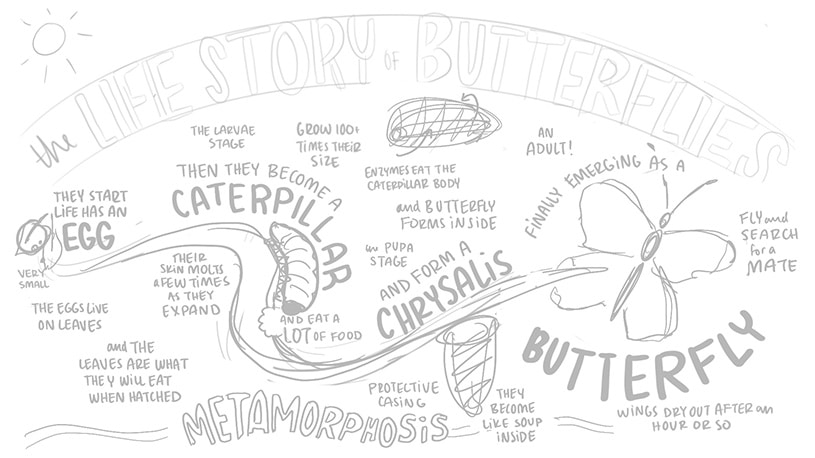
And if you do want to incorporate some icons or images into your visual story but do not want to draw, you have options! Maybe it’s time to cut images out of old magazines and create a collage. If you’re not a paid professional, you can even trace iconography, which is a great way to practice building your visual vocabulary.
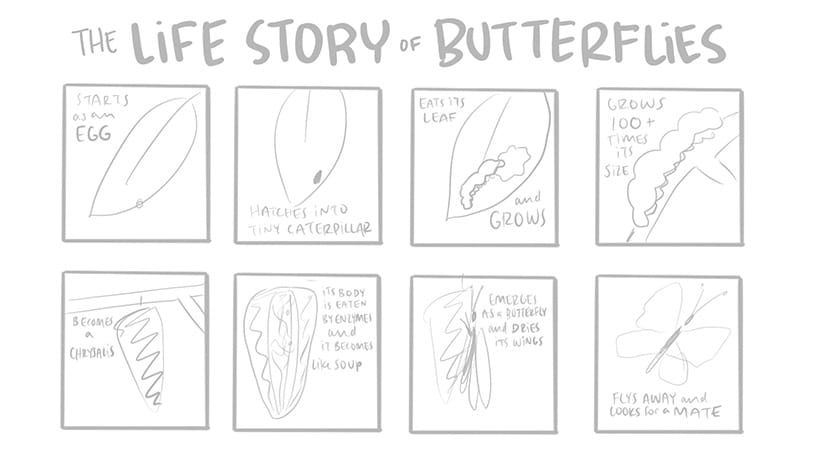
You can also treat it kind of like a comic strip–a different illustrative way of visual storytelling. Another way to set up your illustration is to create a small sketch, also known as a thumbnail sketch, of the story in panels.
3. Finalize the drawing
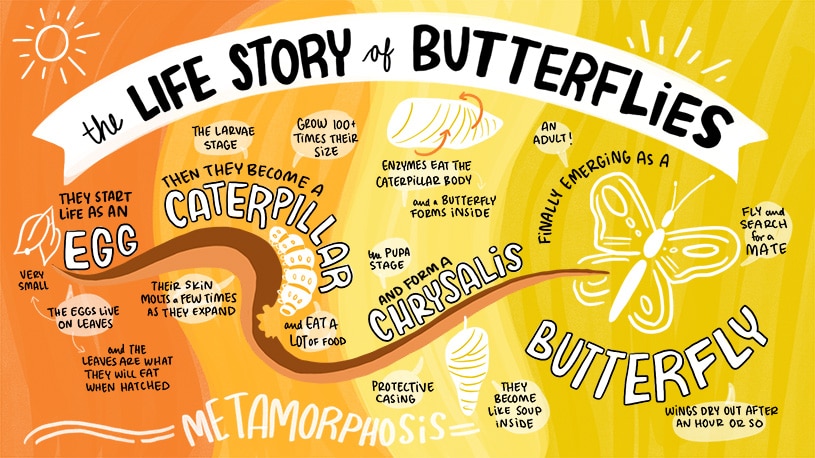
Once everything has a place, you can create a finished drawing. If you had penciled in the title and areas that certain information should go, you can now go ahead and go over it in pen or marker (or on another layer if you are using a digital platform)! It’s a great time to add in connectors and containers as well if you haven’t already, to help organize the information. If you were trying out some different drawings in pencil, now you can spend a little more time inking over the drawings and refining them.
Color can also greatly impact the tone or mood of your story. If you are telling a happy, exciting story, using bright festive colors helps to emphasize that mood. If it is a more serious or sad story, more subdued and cool colors help to ground the image. And if it is the history of a company, oftentimes just using their branding colors helps keep the image relevant to their brand identity.
Now you have created a visual story! Mastery of this skill comes with practice, practice, practice. Each story is unique, as will be each product of your own visual storytelling.